Setup API Collection
This guide will help you create a workspace for experimenting with the Track&Trace APIs using Postman.
1. Before start
To execute Track and Trace and Marco API calls, you will need certain data. If you don't have this data, please contact the Finboot team to provide it to you.
- Authentication:
Client Id: This is the Service Account ID of the account accessing the resources.Client Secret: This is a token generated for the Service Account that allows us to authenticate to the Finboot APIs. The token will look something like this structure: "aaaaaaaa-aaaa-aaaa-aaaa-aaaaaaaaaaaa".Marpp Id: This is the Marco Application for which the authentication will be done. The Service Account needs to have been granted access to this Application.
The Client Secret can be provided via the API with any of the following format:
- aaaaaaaa-aaaa-aaaa-aaaa-aaaaaaaaaaaa
- {"apiToken":"aaaaaaaa-aaaa-aaaa-aaaa-aaaaaaaaaaaa"}
- Track and Trace API Calls:
Organization Id: This is the identifier of the organization making the API call. All calls to this API (except for the authentication call) require this parameter. There may be additional parameters, but theOrganization Idis always mandatory.
2. Import the Track&Trace OpenAPI in your Workspace
We recommend Postman to make requests to our API from a graphical user interface.
If you have a Postman account, you can import the Track&Trace OpenAPI in your workspace by following the following instructions:
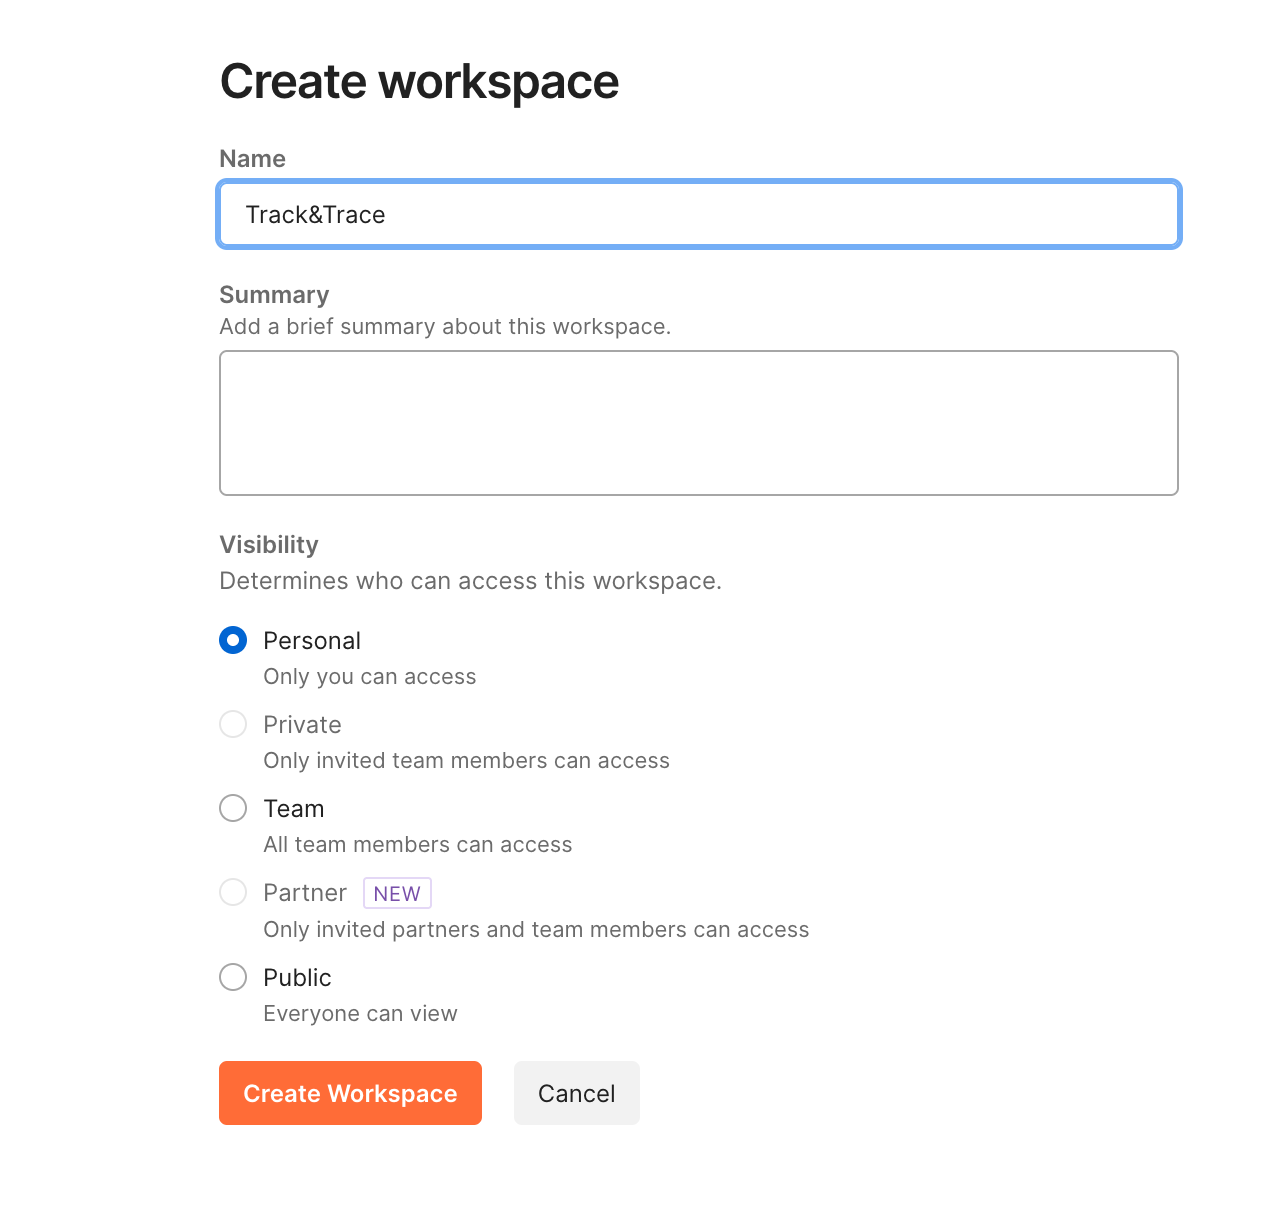
- On Postman, create the Workspace using the
Workspacesmenu.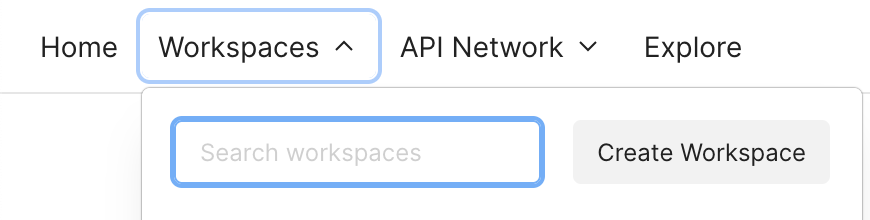
- Click on
importbutton on the top right of the workspace sidebar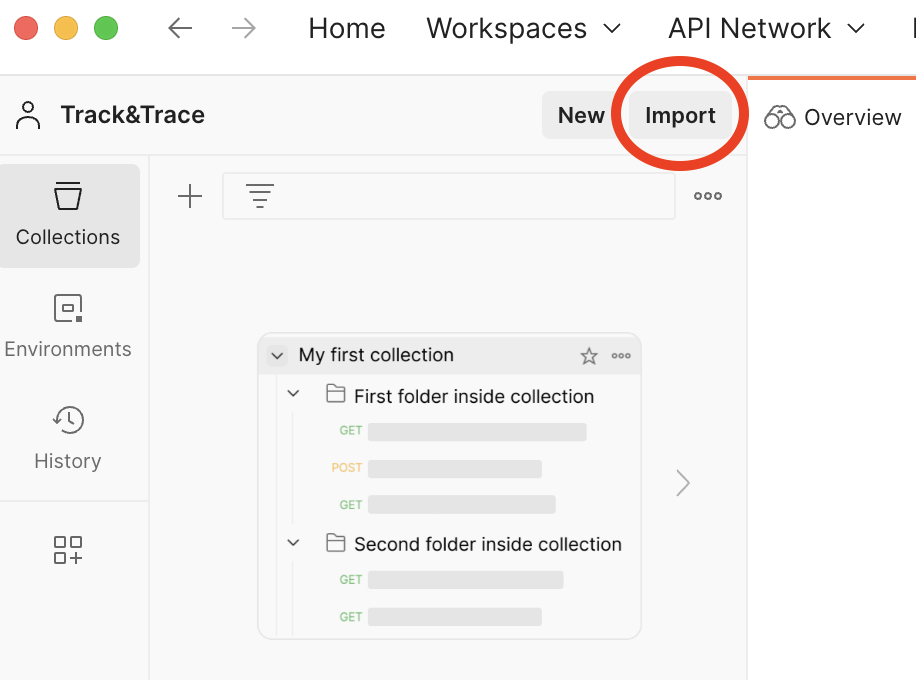
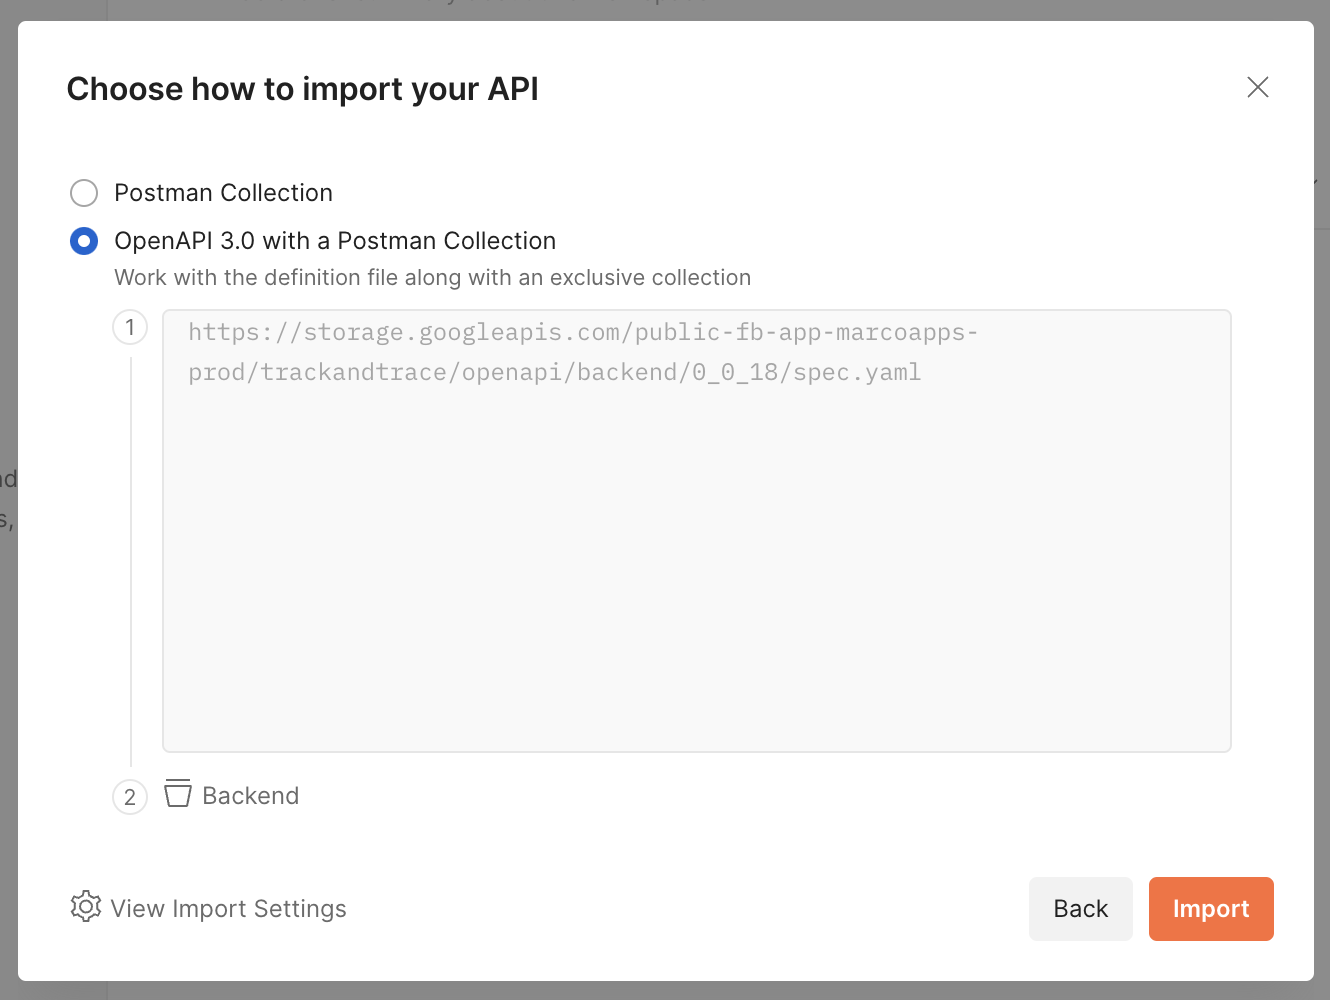
- paste this url in the input field of the prompt import pop-up: https://storage.googleapis.com/public-fb-app-marcoapps-prod/trackandtrace/openapi/backend/0_0_18/spec.yaml.

- Another pop-up will appear. Select the radio button "OpenAPI 3.0 with a Postman Collection" and click on import button.
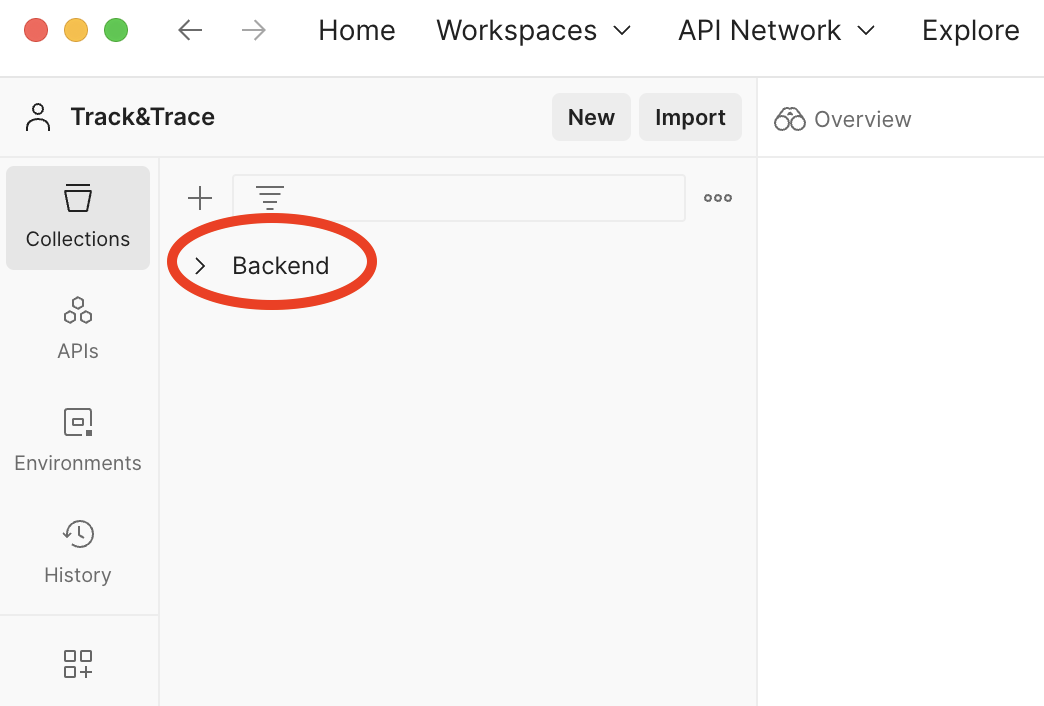
- You will see a new collection called "Backend" which contains all the calls to interact with Track and Trace API.
3. Set up your environment
Once you have forked the API, you will configure Postman to authenticate the requests.
On Postman, go to the Environment section, and click on button
Import.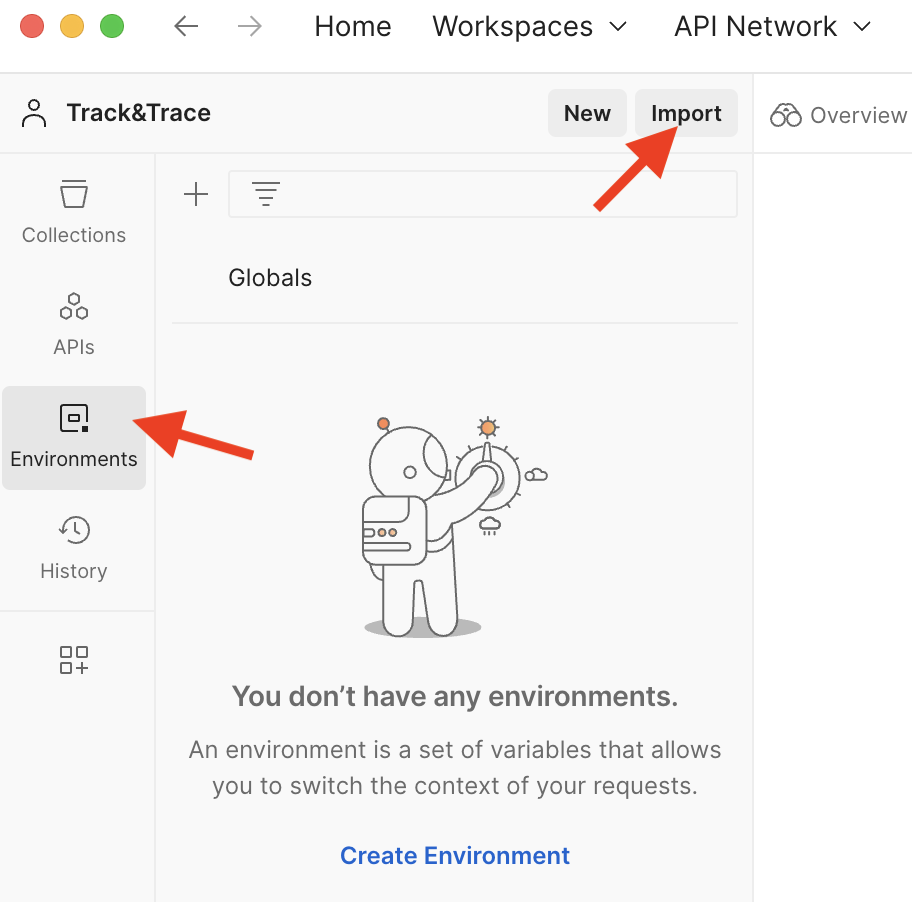
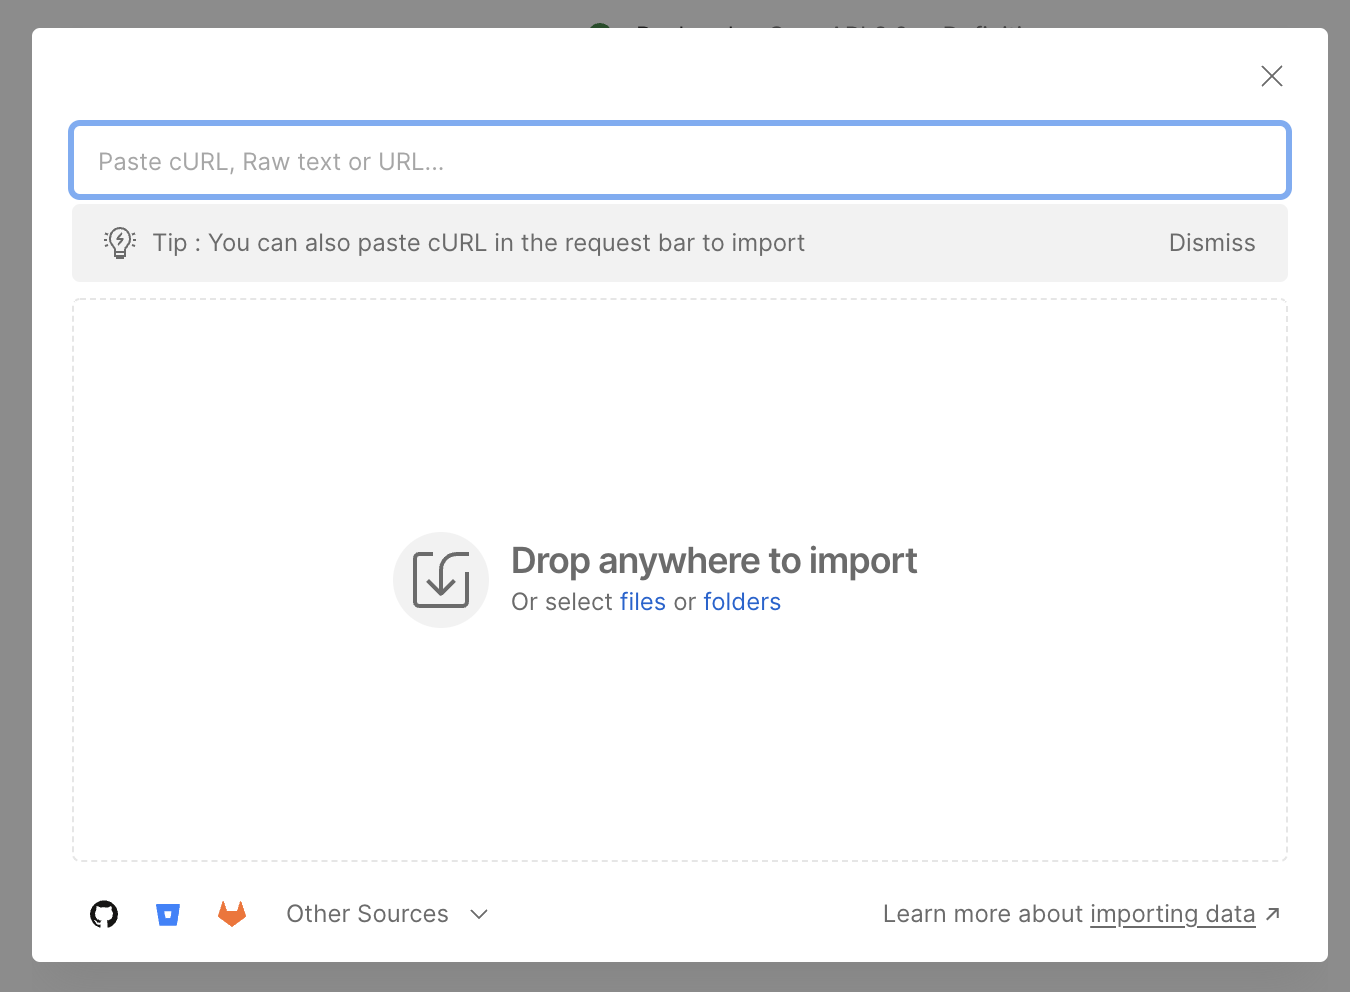
Paste the following url in the import input: Track and Trace default environment
Save your changes with Ctrl + S.
Click on the environment and fill the fields containing "to be filled" with the values provided by the Finboot Team. Save your changes with Ctrl + S.
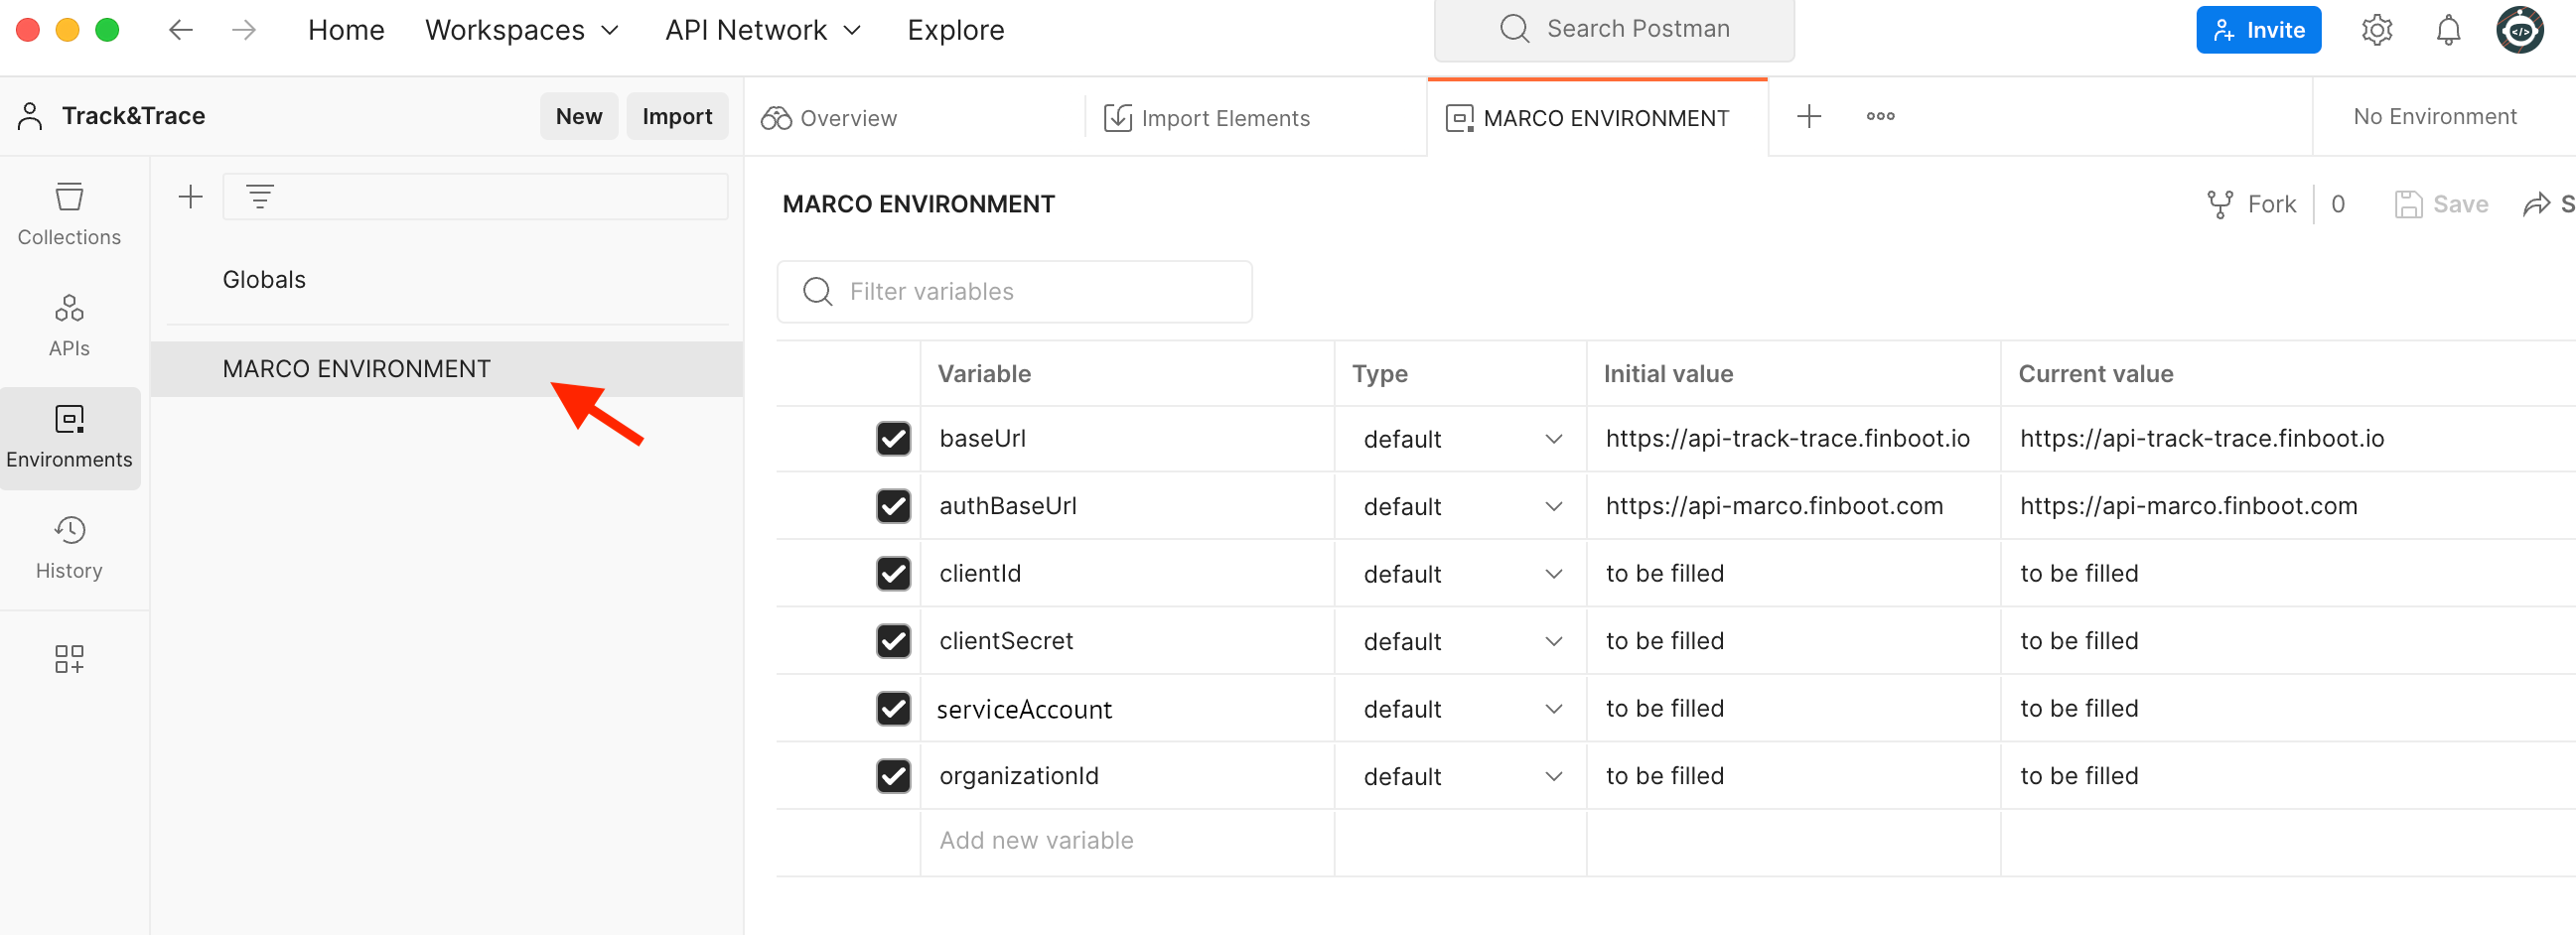
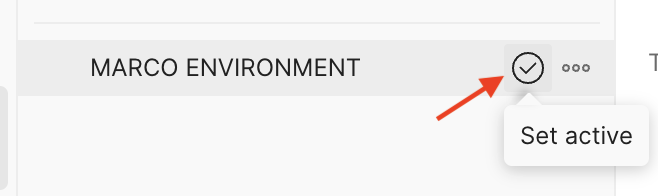
Set the environment to active
(1) Click on the Collections, (2) select Backend Collection, (3) go to the tab Authorization, (4) and set the
type of Authorizationto Oauth 2.0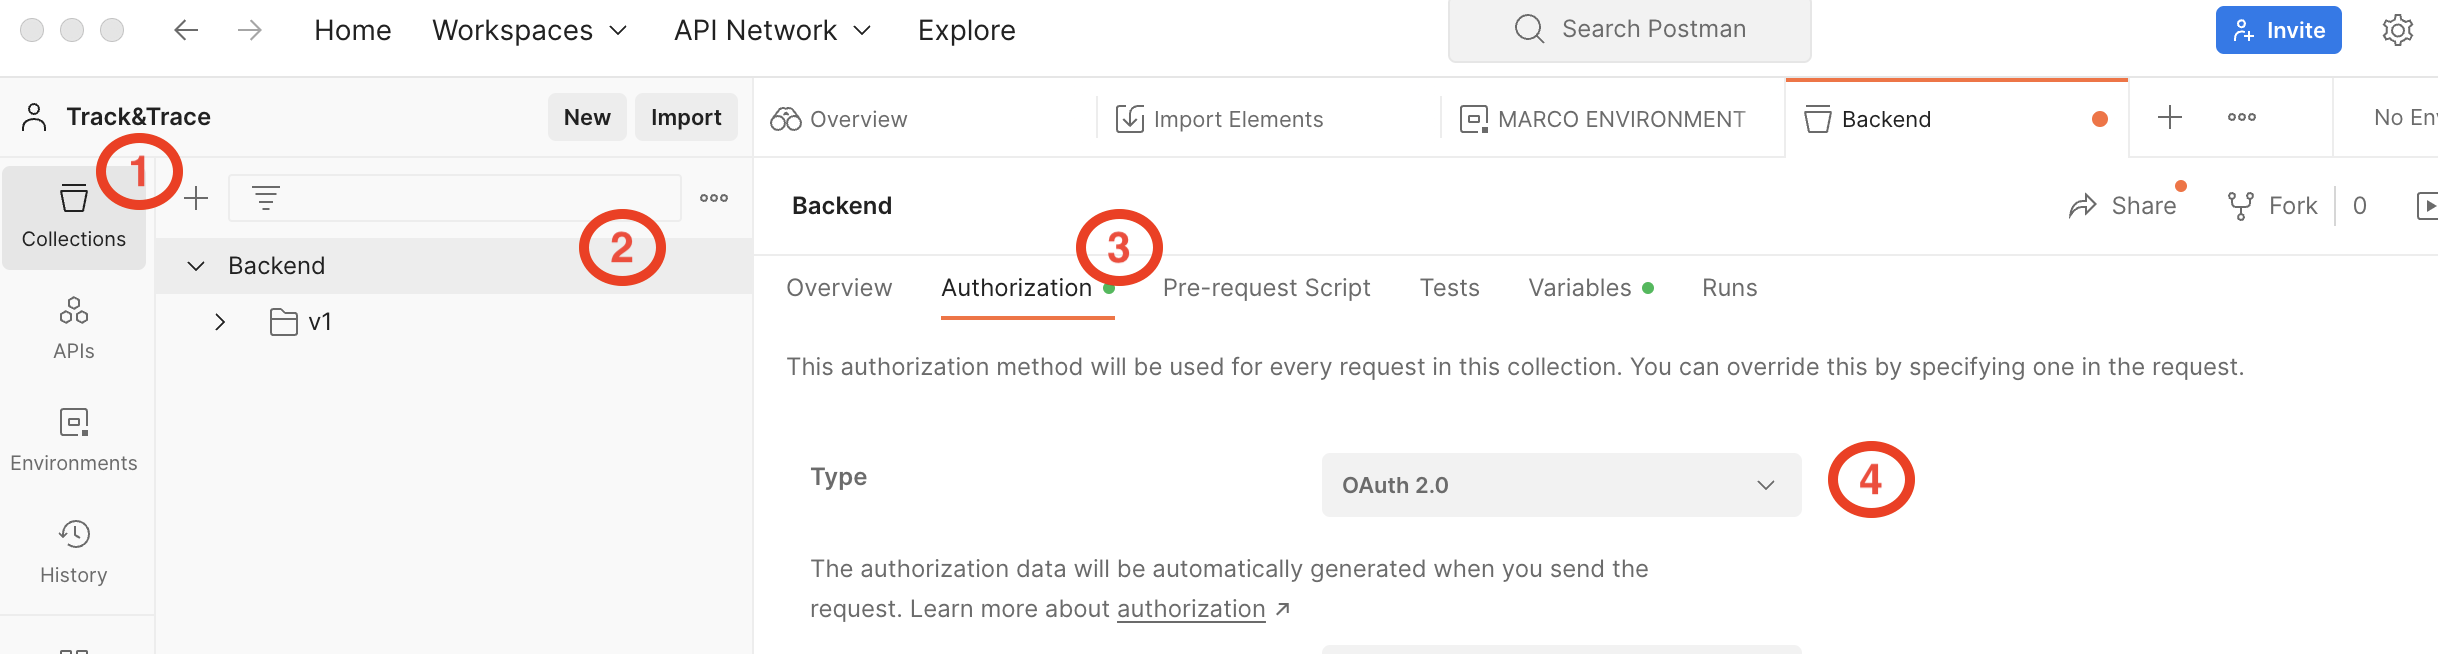
In the same tab, go to the section Configure New Token and fill the inputs with the following information
- (1)
Token NameFinboot - (2)
Grant TypeClient Credentials - (3)
Access Token URL{{authBaseUrl}}/v1/auth/token - (4)
Client ID{{clientId}} - (5)
Client Secret{{clientSecret}} - (6)
Client AuthenticationSend client credentials in body - (7) In the token Request subsection add a new
keymarpp_id and asvalue: {{marppId}}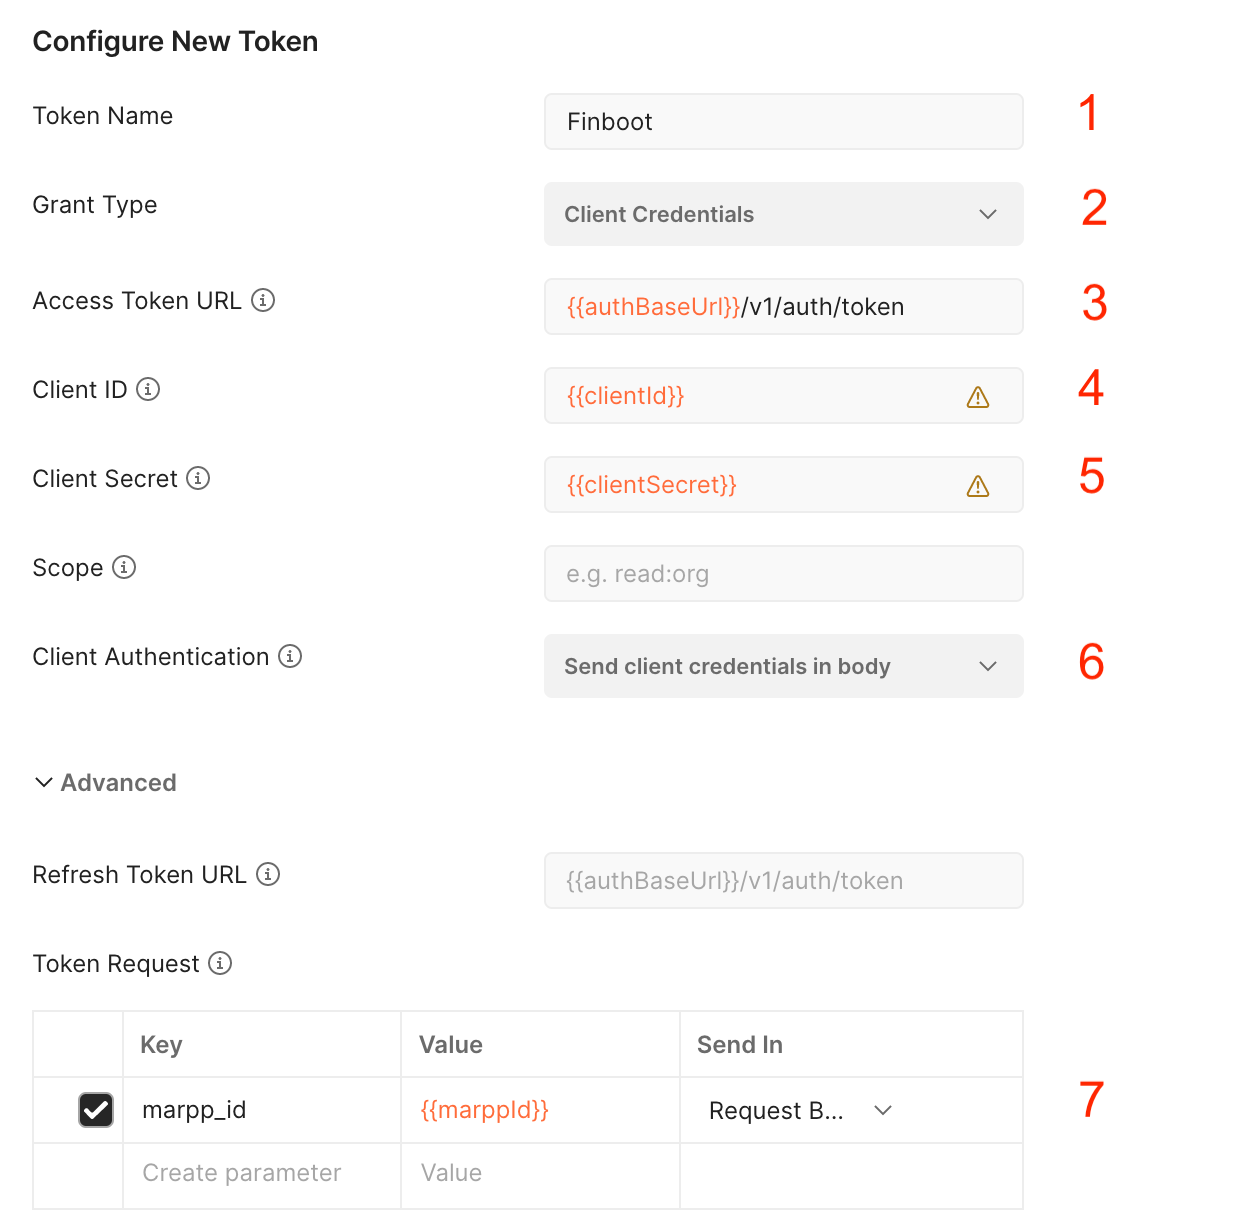
- Generate a new access token by clicking in the button located at the bottom of the Authorization section
Get new access token. If everything went ok you will see a pup up with a green validation icon and the text Authentication complete. Then, in the pop-up window click onProceedbutton
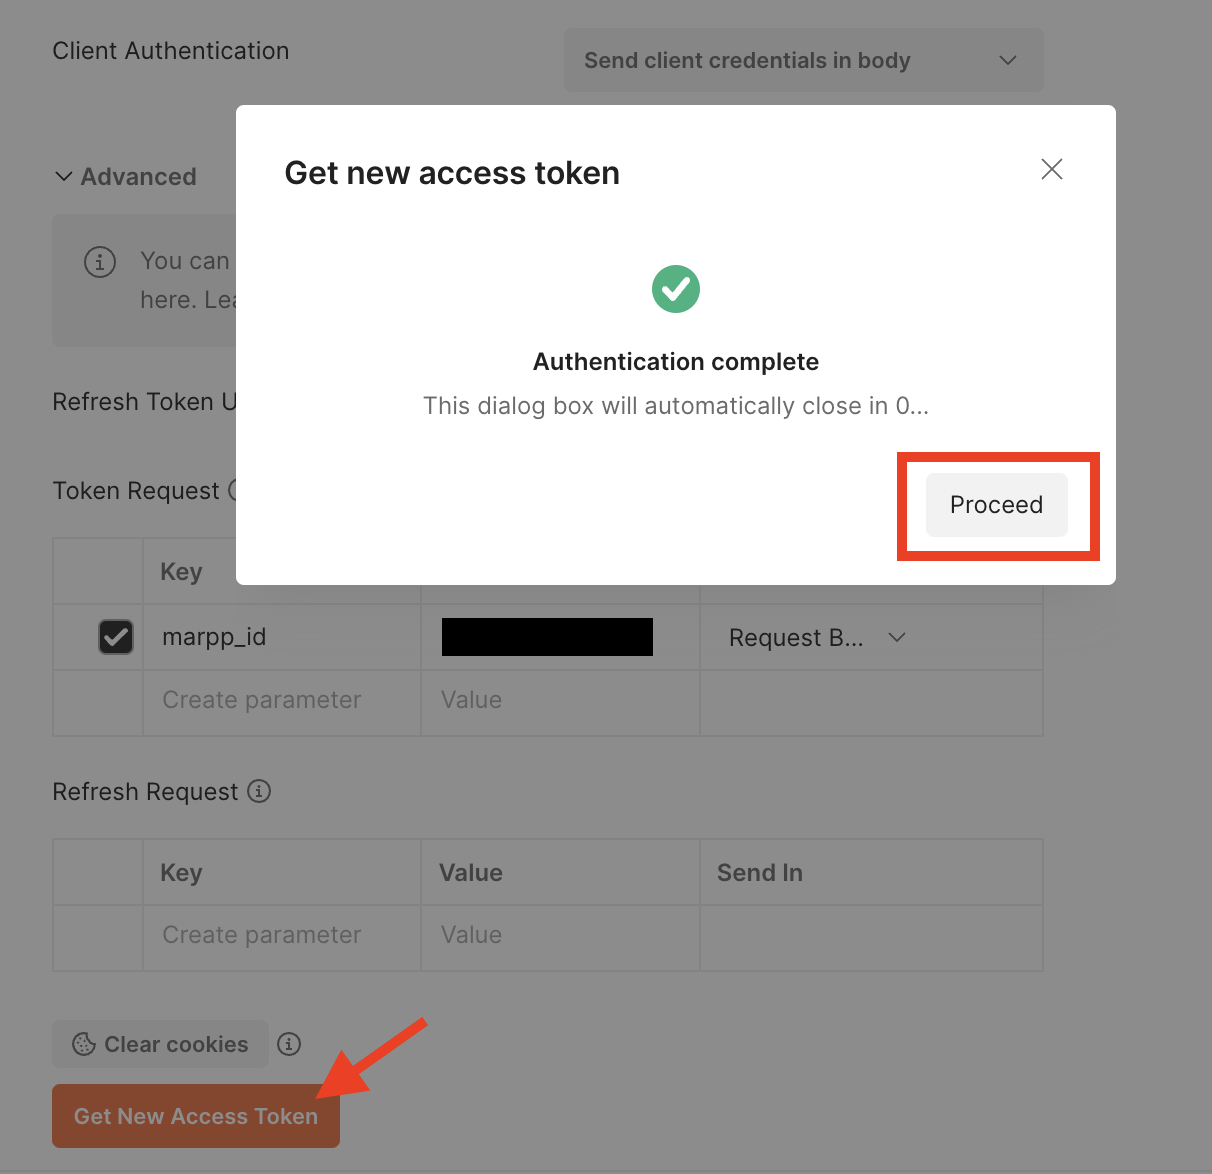
- Click on
use Tokento use the token in the API calls. From this moment onwards the token will be set automatically in every call.

The token has a lifetime of 5 minutes, whenever the token expired you can generate another one following the same process described above.
4. Make your first API call
To test your setup, we recommend to try first the executable workflows endpoint. This endpoint provides all the information related to your supply chains, workflows and steps.
This endpoint provides you all the identifiers needed to execute the rest of all endpoints. The fields supplyChainId , workflowDefintionId or stepDefinitionId are mandatory parameters on most of the API calls
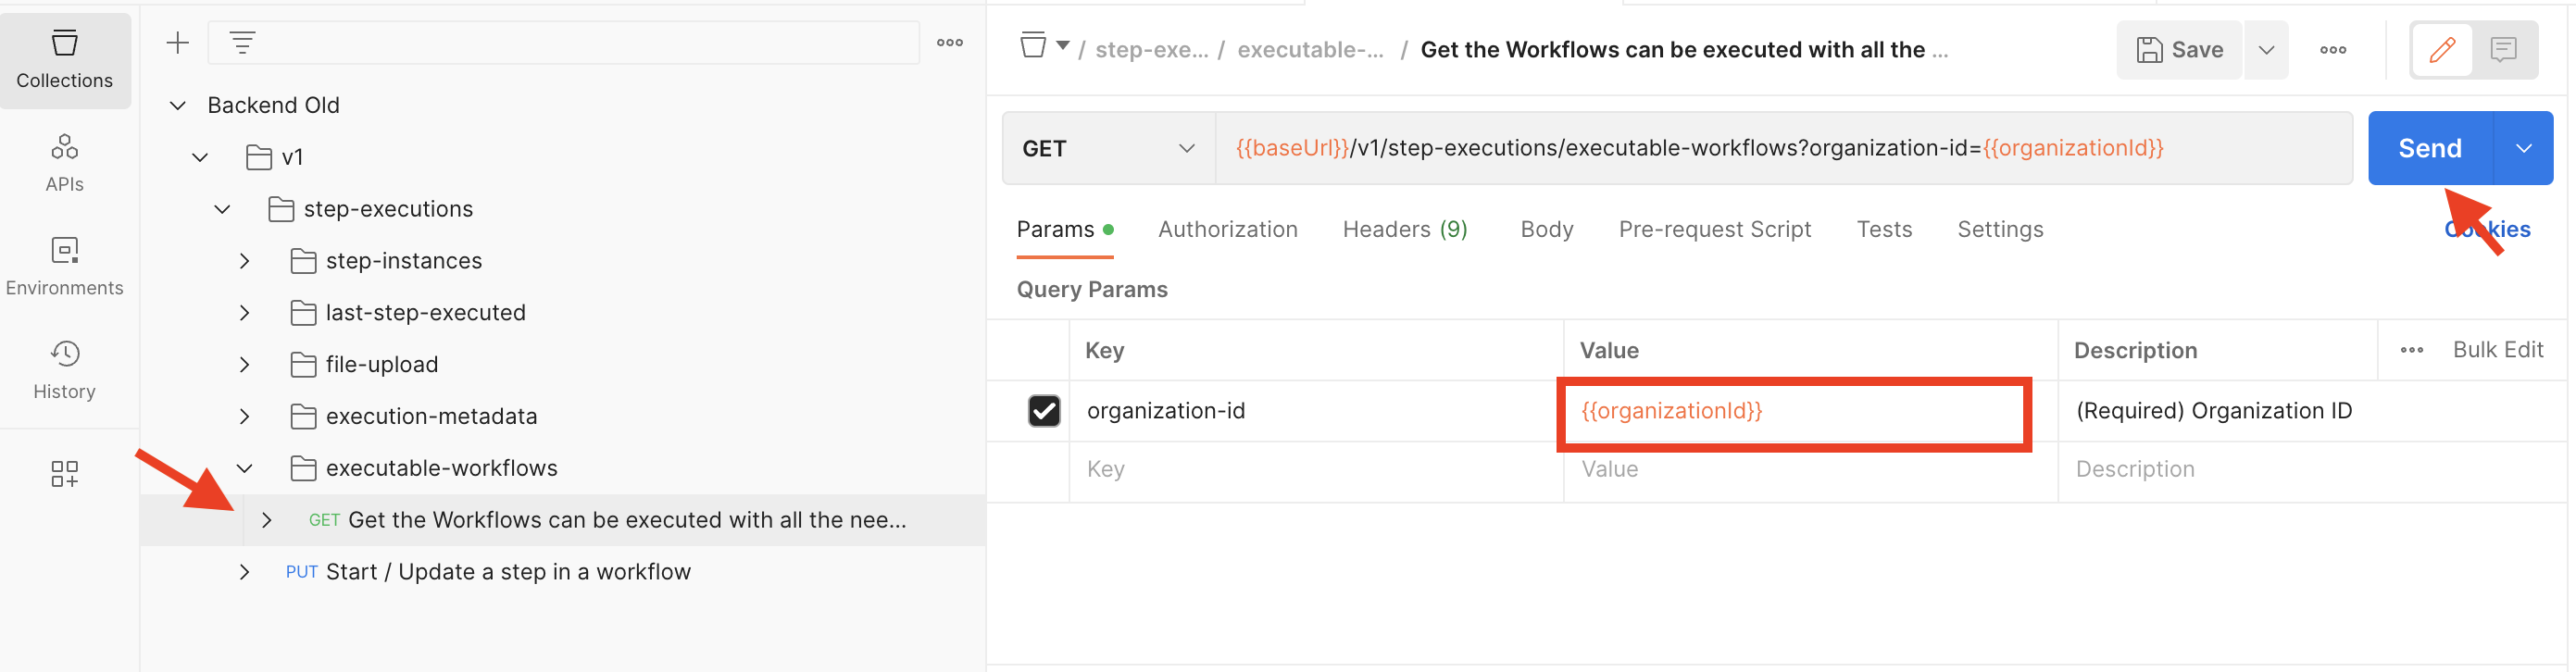
Go to Collections and unfold the Backend folder, find the executable-workflows folder and click on the GET endpoint
Fill the input Value with the environment var previously created, with the text: {{organizationId}}
Click on Send button. You will see the response in the section below the params
In case of any errors, see the API Reference for troubleshooting tips.